
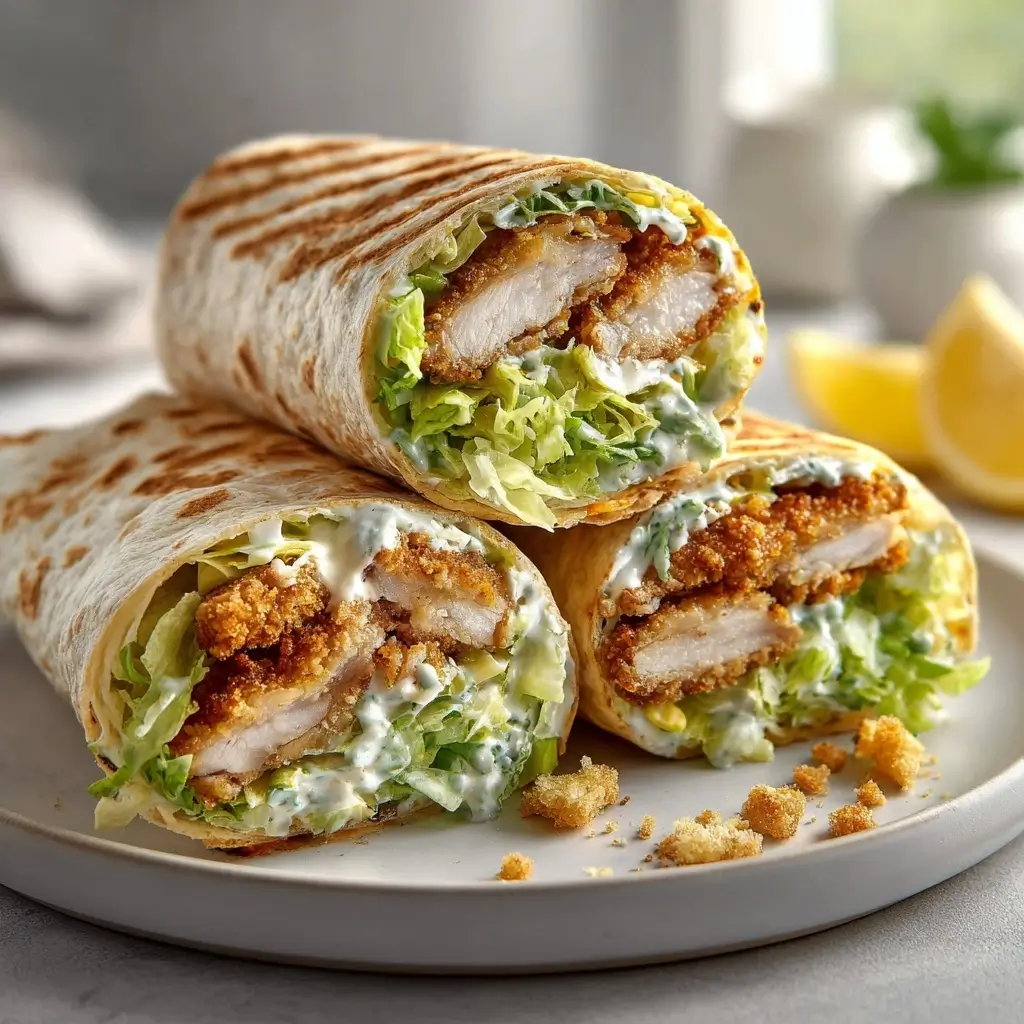
If you love a crisp, creamy wrap that feels satisfying without being fussy, this Crispy Chicken Caesar Wrap is a great one to make at home. It brings together crunchy chicken, cool romaine, and a bold Caesar-style dressing in a soft wrap that holds up beautifully for lunch or dinner.

Crispy Chicken Caesar Wrap
Equipment
- 3 Shallow bowls for breading
- 1 Skillet
- 1 Plate for resting chicken
- 1 Large bowl for tossing lettuce
- 1 Knife for slicing
Ingredients
- 1 lb chicken breast cutlets or tenders pounded thin for even cooking
- 0.5 cup all-purpose flour for the first coating
- 2 eggs whisked for the breading
- 1 cup bread crumbs or panko for crisp texture
- 1 tsp garlic powder for seasoning
- 1 tsp onion powder for savory flavor
- 1 tsp salt to taste
- 0.5 tsp black pepper to taste
- 2 tbsp olive oil or neutral oil for pan-frying
- 4 cups romaine lettuce chopped
- 0.5 cup Parmesan cheese finely grated
- 0.5 cup Caesar-style dressing use one made without alcohol ingredients
- 4 large flour tortillas warmed so they fold easily
- 1 lemon wedges optional for serving
Instructions
- Season the chicken cutlets with salt, pepper, garlic powder, and onion powder. Set up three shallow bowls, one with flour, one with whisked eggs, and one with bread crumbs or panko.
- Coat each piece of chicken in flour, dip it into the egg, then press it into the bread crumbs until well covered. This helps create a crisp, golden crust once cooked.
- Heat a thin layer of oil in a skillet over medium heat. Cook the chicken for several minutes per side until deeply golden and cooked through, then transfer it to a plate and rest briefly before slicing.
- In a bowl, toss the chopped romaine with Caesar-style dressing and Parmesan cheese. Keep the amount of dressing light so the wrap stays fresh and does not get soggy.
- Lay each tortilla flat and add a layer of dressed lettuce down the center. Top with sliced crispy chicken, then add a little extra Parmesan if you like.
- Fold the sides inward, roll tightly, and slice the wrap in half if desired. Serve right away while the chicken is still crisp and warm.
Notes
Why You’ll Love This Crispy Chicken Caesar Wrap
This wrap gives you the best mix of textures, creamy dressing, fresh greens, and golden chicken in every bite. It is also easy to customize, quick to assemble, and perfect for busy days when you want something homemade but still simple.
Crispy Chicken Caesar Wrap Ingredients & Substitutions
- Chicken breast cutlets or tenders, pounded thin for even cooking
- All-purpose flour, for the first coating
- Eggs, whisked for the breading
- Bread crumbs or panko, for crisp texture
- Garlic powder, for seasoning
- Onion powder, for savory flavor
- Salt and black pepper, to taste
- Olive oil or neutral oil, for pan-frying
- Romaine lettuce, chopped
- Parmesan cheese, finely grated
- Caesar-style dressing, use one made without alcohol ingredients
- Large flour tortillas, warmed so they fold easily
- Lemon wedges, optional for serving
If you want to swap the chicken, try grilled chicken strips for a lighter version, or use crispy cauliflower for a vegetarian twist. You can also use gluten-free bread crumbs and tortillas if needed.
Step-by-Step Instructions to Make Crispy Chicken Caesar Wrap
1. Prepare the chicken
Season the chicken cutlets with salt, pepper, garlic powder, and onion powder. Set up three shallow bowls, one with flour, one with whisked eggs, and one with bread crumbs or panko.
2. Bread the chicken
Coat each piece of chicken in flour, dip it into the egg, then press it into the bread crumbs until well covered. This helps create a crisp, golden crust once cooked.
3. Cook until crispy
Heat a thin layer of oil in a skillet over medium heat. Cook the chicken for several minutes per side until deeply golden and cooked through, then transfer it to a plate and rest briefly before slicing.
4. Mix the filling
In a bowl, toss the chopped romaine with Caesar-style dressing and Parmesan cheese. Keep the amount of dressing light so the wrap stays fresh and does not get soggy.
5. Assemble the wraps
Lay each tortilla flat and add a layer of dressed lettuce down the center. Top with sliced crispy chicken, then add a little extra Parmesan if you like.
6. Fold and serve
Fold the sides inward, roll tightly, and slice the wrap in half if desired. Serve right away while the chicken is still crisp and warm.
Tips for Success
For the crispiest chicken, do not overcrowd the pan, and make sure the oil is hot before adding the cutlets. Warm tortillas also make a big difference, since they bend more easily and are less likely to tear.
If you are packing these for later, keep the chicken and lettuce separate until serving time. That helps preserve the texture and keeps every bite fresh.
Variations of Crispy Chicken Caesar Wrap
Try adding sliced avocado for extra creaminess, or include tomato for a fresh pop of color. You can also mix a little lemon zest into the dressing for a brighter flavor.
For a spicy version, add a pinch of chili powder to the breading or drizzle a little hot sauce into the wrap. If you like extra crunch, add thin cucumber slices or shredded cabbage.
Serving Suggestions: What to Pair with Crispy Chicken Caesar Wrap
This wrap pairs nicely with fresh fruit, kettle chips, or a simple veggie side. If you want something more filling, serve it with a bowl of soup or a small side salad.
It also works well alongside iced tea, lemonade, or sparkling water with lemon for a refreshing meal.
Storage & Reheating Instructions
Store the cooked chicken separately from the lettuce and tortillas whenever possible. Keep everything in airtight containers in the refrigerator for up to 3 days.
To reheat the chicken, warm it in an oven or air fryer until hot and crisp again. Avoid microwaving if you can, since it softens the coating. Assemble the wrap just before serving.
Memories Made Around the Table
There is something so comforting about a wrap like this, especially when everyone gets to build their own with the toppings they love. It is the kind of meal that feels casual, cheerful, and easy to share.
FAQs
Can I make this Crispy Chicken Caesar Wrap ahead of time?
You can prepare the chicken and dressing ahead of time, but assemble the wrap just before eating so the lettuce stays crisp and the tortilla does not soften.
What kind of chicken works best?
Thin chicken cutlets or tenders work best because they cook quickly and stay tender inside while the coating turns crisp outside.
How do I keep the wrap from getting soggy?
Use only enough dressing to coat the lettuce lightly, and let the chicken cool for a few minutes before assembling. Keeping the parts separate until serving also helps.
Can I bake the chicken instead of frying it?
Yes, you can bake the breaded chicken on a lined sheet pan until golden and cooked through. The coating will still be satisfying, though the texture will be a little different from pan-frying.
Final Thoughts
This Crispy Chicken Caesar Wrap is one of those reliable recipes that feels both simple and special. With crunchy chicken, fresh greens, and creamy dressing, it is an easy meal you will want to make again and again.