
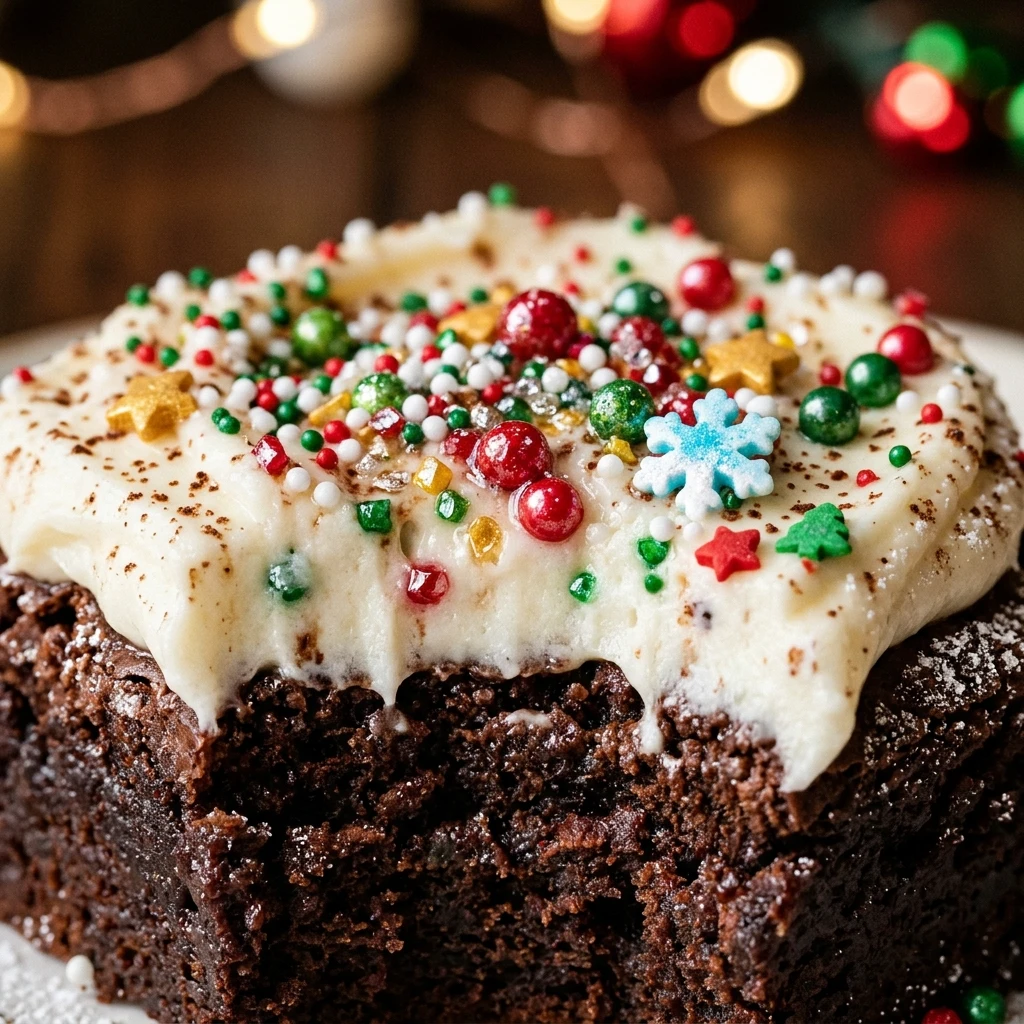
Every year, I look forward to the cozy feeling of a kitchen filled with the scent of melting chocolate and festive holiday cheer. These Frosted Christmas Brownies are my favorite way to celebrate the season because they combine a rich, fudgy base with a creamy, colorful layer of sweetness. I love sharing these decadent treats with friends and family during our annual gift exchange, as they always bring a smile to everyone’s face.
Recipe Details
Recipe Information
- Prep Time: 15 minutes
- Cook Time: 25 minutes
- Total Time: 40 minutes
- Servings: 16 brownies
- Difficulty: Easy
Nutrition Information (Per Serving)
- Calories: 285 kcal
- Protein: 3 grams
- Carbs: 36 grams
- Fat: 15 grams
Why You’ll Love This Frosted Christmas Brownies
These brownies are the ultimate holiday indulgence, offering a perfect balance between a dense, cocoa-rich center and a light, velvety frosting. Because they are so simple to prepare, you can spend less time in the kitchen and more time enjoying the festivities with your loved ones. The festive colors and sprinkles make them a standout addition to any dessert table, and the fudgy texture ensures they stay moist for days. You will find that the addition of alcohol-free peppermint or vanilla gives them that nostalgic Christmas flavor that everyone craves this time of year.
Frosted Christmas Brownies Ingredients & Substitutions
- 1 cup unsalted butter, melted
- 2 cups granulated sugar
- 4 large eggs, room temperature
- 1 teaspoon alcohol-free vanilla extract
- 3/4 cup unsweetened cocoa powder
- 1 cup all-purpose flour
- 1/2 teaspoon salt
- 1/2 cup unsalted butter, softened (for frosting)
- 2 cups powdered sugar (for frosting)
- 2 tablespoons milk or heavy cream (for frosting)
- 1/2 teaspoon alcohol-free peppermint extract or vanilla extract (for frosting)
- Red or green food coloring
- Festive holiday sprinkles or crushed candy canes
If you prefer a deeper flavor, you can substitute half of the granulated sugar with brown sugar for a chewier texture. For a gluten-free option, a 1:1 gluten-free baking flour works well in this specific recipe. If you do not have milk on hand for the frosting, you can use a splash of water or a dairy-free milk alternative, though the texture may be slightly less creamy.
Step-by-Step Instructions to Make Frosted Christmas Brownies
Step 1: Preparation
Preheat your oven to 350 degrees Fahrenheit. Line a 9×9 inch square baking pan with parchment paper, leaving a slight overhang on the sides to make it easier to lift the brownies out later. Lightly grease any exposed parts of the pan with butter or a light coating of oil.
Step 2: Mix the Brownie Batter
In a large mixing bowl, combine the melted butter and granulated sugar, stirring until well combined. Add the eggs one at a time, whisking well after each addition. Stir in the alcohol-free vanilla extract. Sift in the cocoa powder, flour, and salt, then gently fold the dry ingredients into the wet mixture using a spatula until just combined. Do not overmix, as this can make the brownies tough.
Step 3: Bake and Cool
Pour the batter into the prepared baking pan and spread it evenly with a spatula. Bake for 25 to 30 minutes, or until a toothpick inserted into the center comes out with just a few moist crumbs attached. Remove the pan from the oven and place it on a wire rack to cool completely. It is vital that the brownies are totally cool before you attempt to add the frosting.
Step 4: Prepare the Festive Frosting
In a medium bowl, beat the softened butter until it is smooth and creamy. Gradually add the powdered sugar one cup at a time, beating on low speed until incorporated. Add the milk and your choice of alcohol-free extract. Increase the speed and beat until the frosting is fluffy. Add a few drops of red or green food coloring and mix until the desired holiday shade is achieved.
Step 5: Frost and Decorate
Once the brownies are completely cool, spread the frosting in an even layer over the top. Immediately garnish with holiday sprinkles or crushed candy canes so they stick to the fresh frosting. Lift the brownies out of the pan using the parchment paper edges and cut them into 16 squares.
Tips for Success
To ensure the best results, always use room temperature eggs, as they incorporate more easily into the butter and sugar mixture. Sifting your cocoa powder is a small step that makes a big difference by preventing bitter lumps in your batter. If you want perfectly clean edges when cutting, try chilling the frosted brownies in the refrigerator for 30 minutes before slicing. Use a sharp knife and wipe it clean between every single cut to maintain those beautiful layers.
Variations of Frosted Christmas Brownies
You can easily customize these brownies to suit your family’s preferences. For a minty twist, add a half cup of chocolate chips and a teaspoon of peppermint extract to the brownie batter itself. If you enjoy a bit of crunch, fold in some chopped pecans or walnuts before baking. You can also experiment with different frosting colors, perhaps creating a marbled effect by swirling red and white frosting together on top of the dark chocolate base.
Serving Suggestions: What to Pair with Frosted Christmas Brownies
These rich brownies pair wonderfully with a warm mug of hot cocoa topped with marshmallows. For a more sophisticated holiday dessert plate, serve a brownie square alongside a scoop of premium vanilla bean ice cream or a dollop of fresh whipped cream. If you are hosting a party, they look beautiful when served on a platter with fresh raspberries or a few sprigs of mint for a natural festive touch. A cold glass of milk is also a classic companion that balances the sweetness of the frosting.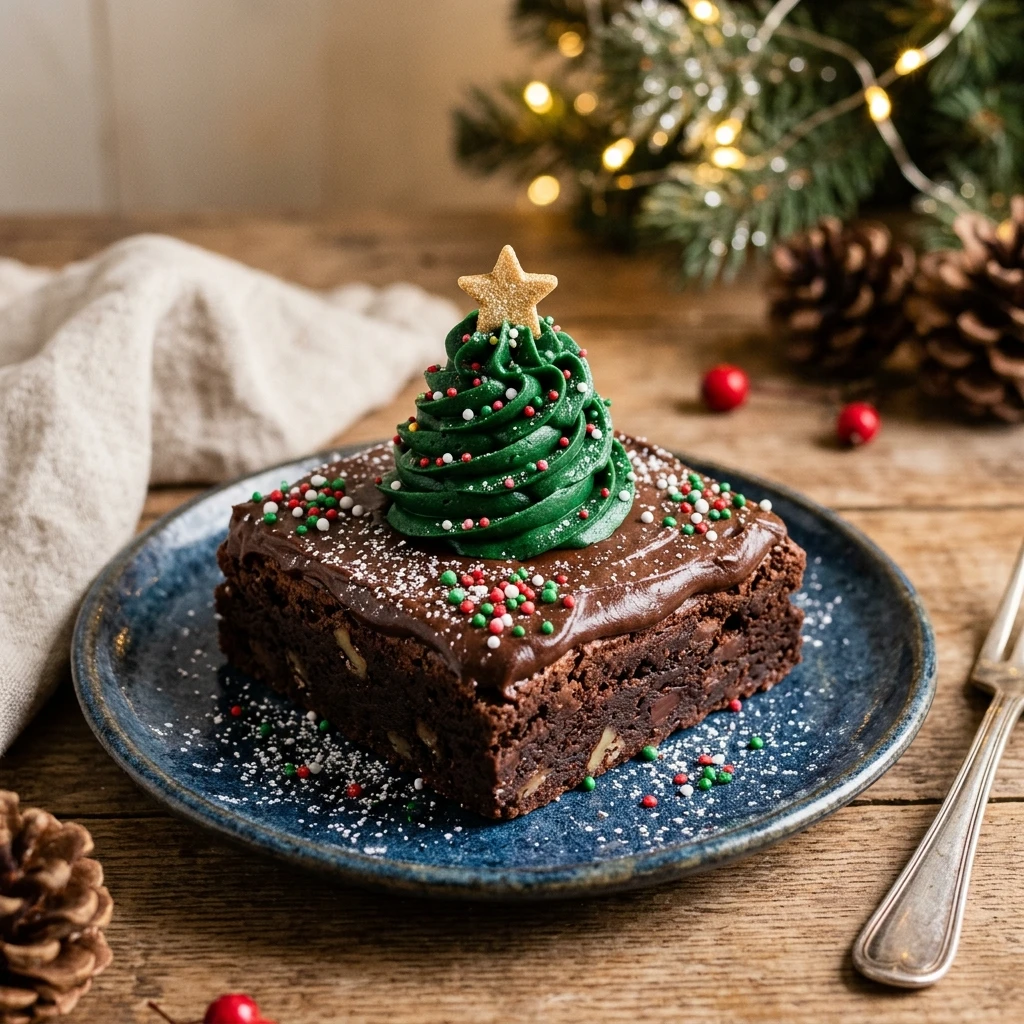
Storage & Reheating Instructions
Store any leftover brownies in an airtight container at room temperature for up to four days. If your kitchen is particularly warm, you can keep them in the refrigerator for up to one week to prevent the frosting from softening too much. To freeze, wrap individual un-frosted brownies tightly in plastic wrap and place them in a freezer bag for up to three months. If you prefer a warm brownie, you can microwave a single square for about 10 seconds, though this is best done before the frosting is applied.
Memories Made Around the Table
Growing up, my grandmother always had a decorative tin of these brownies sitting on her mahogany side table throughout December. I remember sneaking into the kitchen with my siblings just to lick the leftover green frosting from the mixing bowl when she wasn’t looking. Now that I have my own kitchen, making these brownies has become a tradition that signals the official start of the holiday season. Seeing my children get excited about choosing which sprinkles to use reminds me that the best part of baking is the joy it brings to those we love.
FAQs
How do I know when the brownies are done baking?
The best way to check is with the toothpick test. Insert a toothpick into the center of the pan about five minutes before the timer goes off. You want the toothpick to come out with a few moist crumbs. If it comes out with wet batter, they need more time. If it comes out completely clean, they might be slightly overbaked, so keep a close eye on them during the final minutes.
Can I use store-bought frosting instead of making it?
Yes, you can certainly use a tub of store-bought vanilla or chocolate frosting if you are short on time. To make it more festive, you can still add food coloring and extracts to the store-bought version. Just ensure the brownies are completely cool before spreading it on, as store-bought frosting tends to melt faster than homemade buttercream.
Why did my frosting turn out runny?
Frosting usually becomes runny if too much liquid is added or if the butter was too soft. To fix this, simply beat in more powdered sugar, one tablespoon at a time, until it reaches the desired consistency. Alternatively, if your kitchen is very warm, putting the frosting in the fridge for ten minutes can help it firm up before you spread it.
Do I have to use food coloring?
Not at all. You can leave the frosting white to represent snow, which looks beautiful against the dark brownie base. You can also use natural dyes like beet juice for red or matcha powder for green if you prefer to avoid synthetic food colorings. The taste will remain delicious regardless of the color you choose.
Can I make these brownies ahead of time?
These are excellent for making ahead of time. You can bake the brownies a day in advance and store them tightly wrapped at room temperature. Frost them on the day you plan to serve them for the freshest appearance. The flavors actually meld together beautifully after sitting for a few hours, making them perfect for holiday planning.
Final Thoughts
Frosted Christmas Brownies are a quintessential holiday treat that brings together the best of chocolatey goodness and festive flair. Whether you are baking them for a school party, a neighborhood gathering, or just a cozy night in, they are sure to be a hit. The combination of the dense brownie and the sweet peppermint-scented frosting captures the essence of Christmas in every bite. I hope this recipe becomes as much of a staple in your holiday celebrations as it has in mine.
Frosted Christmas Brownies
- Total Time: 40 minutes
Ingredients
- 1 cup unsalted butter, melted
- 2 cups granulated sugar
- 4 large eggs, room temperature
- 1 teaspoon alcohol-free vanilla extract
- 3/4 cup unsweetened cocoa powder
- 1 cup all-purpose flour
- 1/2 teaspoon salt
- 1/2 cup unsalted butter, softened (for frosting)
- 2 cups powdered sugar (for frosting)
- 2 tablespoons milk or heavy cream (for frosting)
- 1/2 teaspoon alcohol-free peppermint extract or vanilla extract (for frosting)
- Red or green food coloring
- Festive holiday sprinkles or crushed candy canes
Instructions
- Preheat your oven to 350 degrees Fahrenheit. Line a 9×9 inch square baking pan with parchment paper, leaving a slight overhang on the sides to make it easier to lift the brownies out later. Lightly grease any exposed parts of the pan with butter or a light coating of oil.
- In a large mixing bowl, combine the melted butter and granulated sugar, stirring until well combined. Add the eggs one at a time, whisking well after each addition. Stir in the alcohol-free vanilla extract. Sift in the cocoa powder, flour, and salt, then gently fold the dry ingredients into the wet mixture using a spatula until just combined. Do not overmix, as this can make the brownies tough.
- Pour the batter into the prepared baking pan and spread it evenly with a spatula. Bake for 25 to 30 minutes, or until a toothpick inserted into the center comes out with just a few moist crumbs attached. Remove the pan from the oven and place it on a wire rack to cool completely. It is vital that the brownies are totally cool before you attempt to add the frosting.
- In a medium bowl, beat the softened butter until it is smooth and creamy. Gradually add the powdered sugar one cup at a time, beating on low speed until incorporated. Add the milk and your choice of alcohol-free extract. Increase the speed and beat until the frosting is fluffy. Add a few drops of red or green food coloring and mix until the desired holiday shade is achieved.
- Once the brownies are completely cool, spread the frosting in an even layer over the top. Immediately garnish with holiday sprinkles or crushed candy canes so they stick to the fresh frosting. Lift the brownies out of the pan using the parchment paper edges and cut them into 16 squares.
- Cook Time: 40 minutes
- Diet: Vegetarian